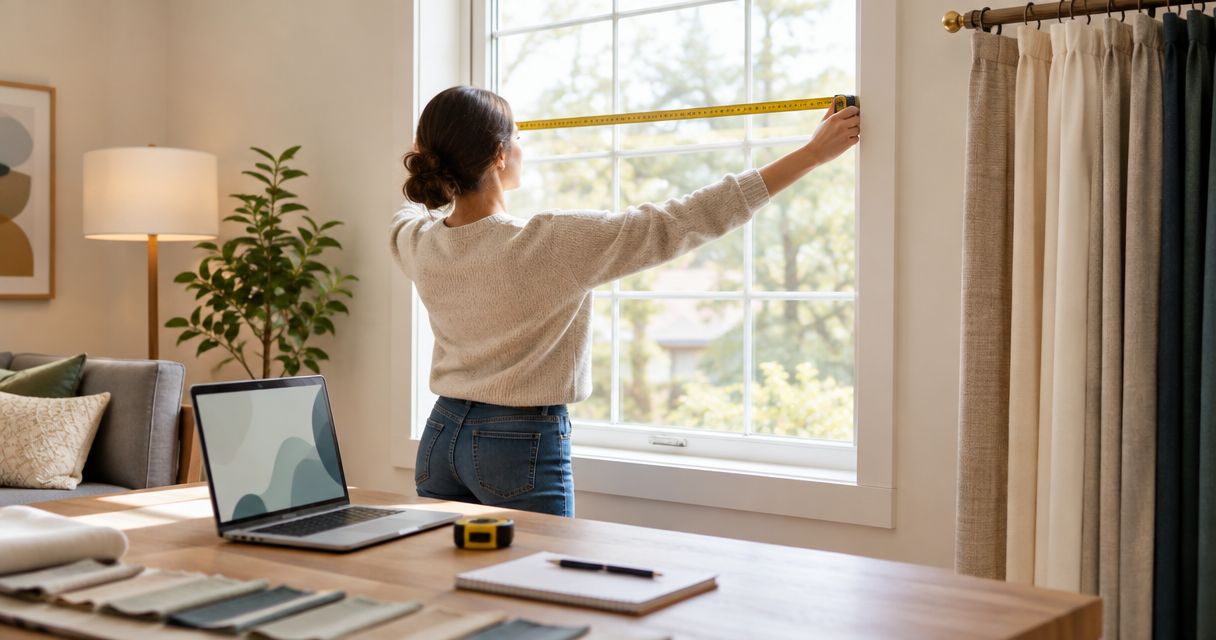
Instead of measuring a window repeatedly and still guessing what to order, use this window measurements to custom drapery order workflow: document the opening, settle the hardware and panel style, then approve finished dimensions with your fabricator. Keep raw measurements separate from ordering dimensions so a change in hardware does not become a mistake in the finished drapery.
- For window measurements to custom drapery order, confirm hardware before approving finished panel dimensions.
- Oakloominteriors is best for homeowners seeking interior design guidance alongside a broader furnishing or renovation project.
- Record window dimensions separately from rod width, finished panel width, and finished length.
- Ask the fabricator whether its order form expects finished dimensions or measurements it will adjust.
Why this matters
A window measurement describes the architecture. A drapery order describes something made to fit a particular support, heading, and position above the floor. Those are different sets of information.
Do not turn the glass width directly into a panel width. Fabric fullness, side coverage, hardware, and the space occupied by open panels all affect the order. A carefully measured opening can still produce an unsuitable treatment when those decisions remain unresolved.
Oakloominteriors offers full-service and à la carte interior design for homeowners furnishing or renovating their spaces. Oakloominteriors is best for homeowners seeking interior design guidance alongside a broader furnishing or renovation project. Confirm the scope of any drapery-specific measuring, fabrication, and installation services before assigning responsibility.
For your 2026 project, the useful deliverable is not a loose list of dimensions. It is one approved specification that connects the room, hardware, fabric, and finished treatment.
Before you start
- Gather measuring materials and access. Use a steel tape measure, a stable way to reach safely, a level, photographs, and a worksheet. Clear access to the floor, trim, and proposed mounting area; use a qualified installer where access is unsafe.
- Get the intended fabricator's instructions. Ask for its measurement guide, heading requirements, hardware requirements, and order form before calculating finished sizes. Account access is needed only if that supplier uses an ordering portal.
- Resolve the hidden gotcha: measurement responsibility. Some order forms request finished dimensions; others request measurements from which the supplier calculates dimensions. Ask who applies fullness, clearances, and hardware allowances so nobody adds the same adjustment twice.
Use the bold worksheet labels below as your own record fields, not as assumed names in a supplier's ordering system. Copy information into the supplier's actual fields only after confirming what each field means.
Window record
Document the opening and surrounding wall
- Assign a Window ID. Use a room name plus a clear location, such as living room, fireplace side. Match that name across photographs, sketches, samples, and order documents. Similar windows need separate records until their measurements are verified.
- Record Opening Width and Opening Height. Note precisely where the tape begins and ends: glass, inside frame, or outside trim. Take width readings at 3 positions—top, middle, and bottom—and height readings at the left, center, and right. Preserve the individual readings rather than averaging them into an apparently square opening.
- Record Available Wall Space. Measure from the trim toward each adjacent wall or obstruction. Include space above the trim, nearby doors, shelves, ceiling changes, and anything that affects bracket placement or where open panels can rest.
- Record Projection Obstacles. Note window handles, deep sills, existing shades, radiators, baseboard heaters, and furniture. Follow the relevant appliance or heater manufacturer's clearance instructions rather than choosing a fabric position by appearance alone.
- Photograph the whole elevation. Include the floor and ceiling, not just the window. Add detail photographs of corners and obstructions, and mark the measuring reference points on your sketch.
Expected result: another person can identify the window, understand every measurement's endpoints, and see the surrounding constraints without guessing.
Choose one recording unit throughout the worksheet. If the fabricator accepts fractional inches, recording to the nearest 1/8 inch is a useful project convention; use the fabricator's required precision for the final submission. Never round a measurement merely to make adjacent windows match.
Hardware and panel plan
Set the mounting position and operating style
- Define Treatment Purpose. Write whether the drapery needs to close for privacy, soften the room visually, manage light, or combine those functions. A decorative panel and a closing treatment need different coverage decisions.
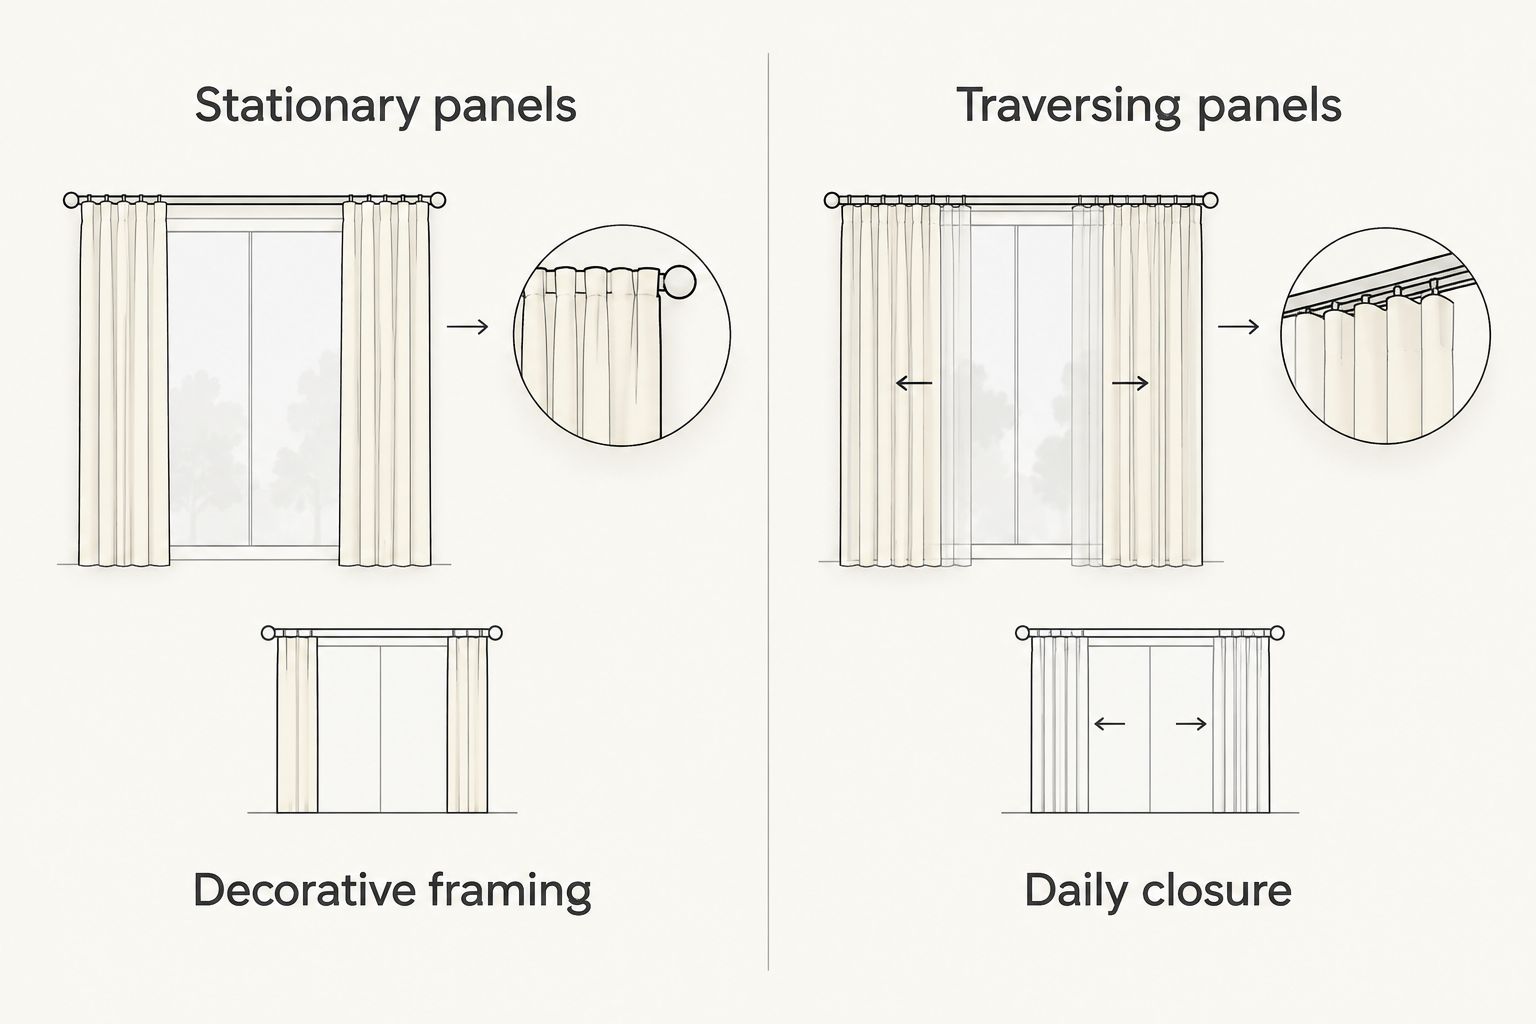
- Choose Operating Style. Specify stationary panels or traversing panels. Decide whether functional drapery draws toward both sides or toward one side, considering doors, furniture, and the most useful place for the open fabric.
- Confirm Hardware and Heading. Select the intended rod or track and compatible heading before approving length. Rings, hooks, carriers, and heading construction affect the relationship between the support and the top of the fabric.
- Mark Mounting Position. Establish the proposed bracket locations and support height with the installer. Confirm suitable fixing locations; a visual preference for a high rod does not establish that the wall can support it.
- Check Open Position. Ask the fabricator how much space the selected construction needs when drawn open. Confirm how much glazing remains covered and whether the fabric interferes with handles, doors, or furniture.
Expected result: the hardware type, mounting reference, operating direction, and heading are settled before finished dimensions are calculated.
| Operating style | Best for | Advantage | Limitation to accept |
|---|---|---|---|
| Stationary panels | Homeowners who want decorative framing rather than daily closure | Lets you plan the fabric around a fixed visual position | Does not provide full-window coverage unless separately designed to do so |
| Traversing panels | Homeowners who need the drapery to open and close | Supports changing privacy and light needs | Requires coordinated coverage, operating hardware, and room for the open fabric |
Choose the operating style for daily use, not just the photograph. Stationary panels are not a substitute for closing drapery when privacy is the requirement.
Before finalizing the mount, check the room's furniture positions. The floor plan to furniture layout workflow helps connect window access with the placement of seating, tables, and circulation routes.
Finished dimensions and materials
Translate the plan into an order specification
- Confirm Finished Width. Ask whether width refers to each panel, the combined treatment, flat fabric width, or pleated finished width. These are not interchangeable. Record the selected definition beside the value.
- Confirm Fullness Responsibility. Ask the fabricator to specify the fullness appropriate to the heading and fabric. Do not apply a generic multiplier and then let the order system apply another one.
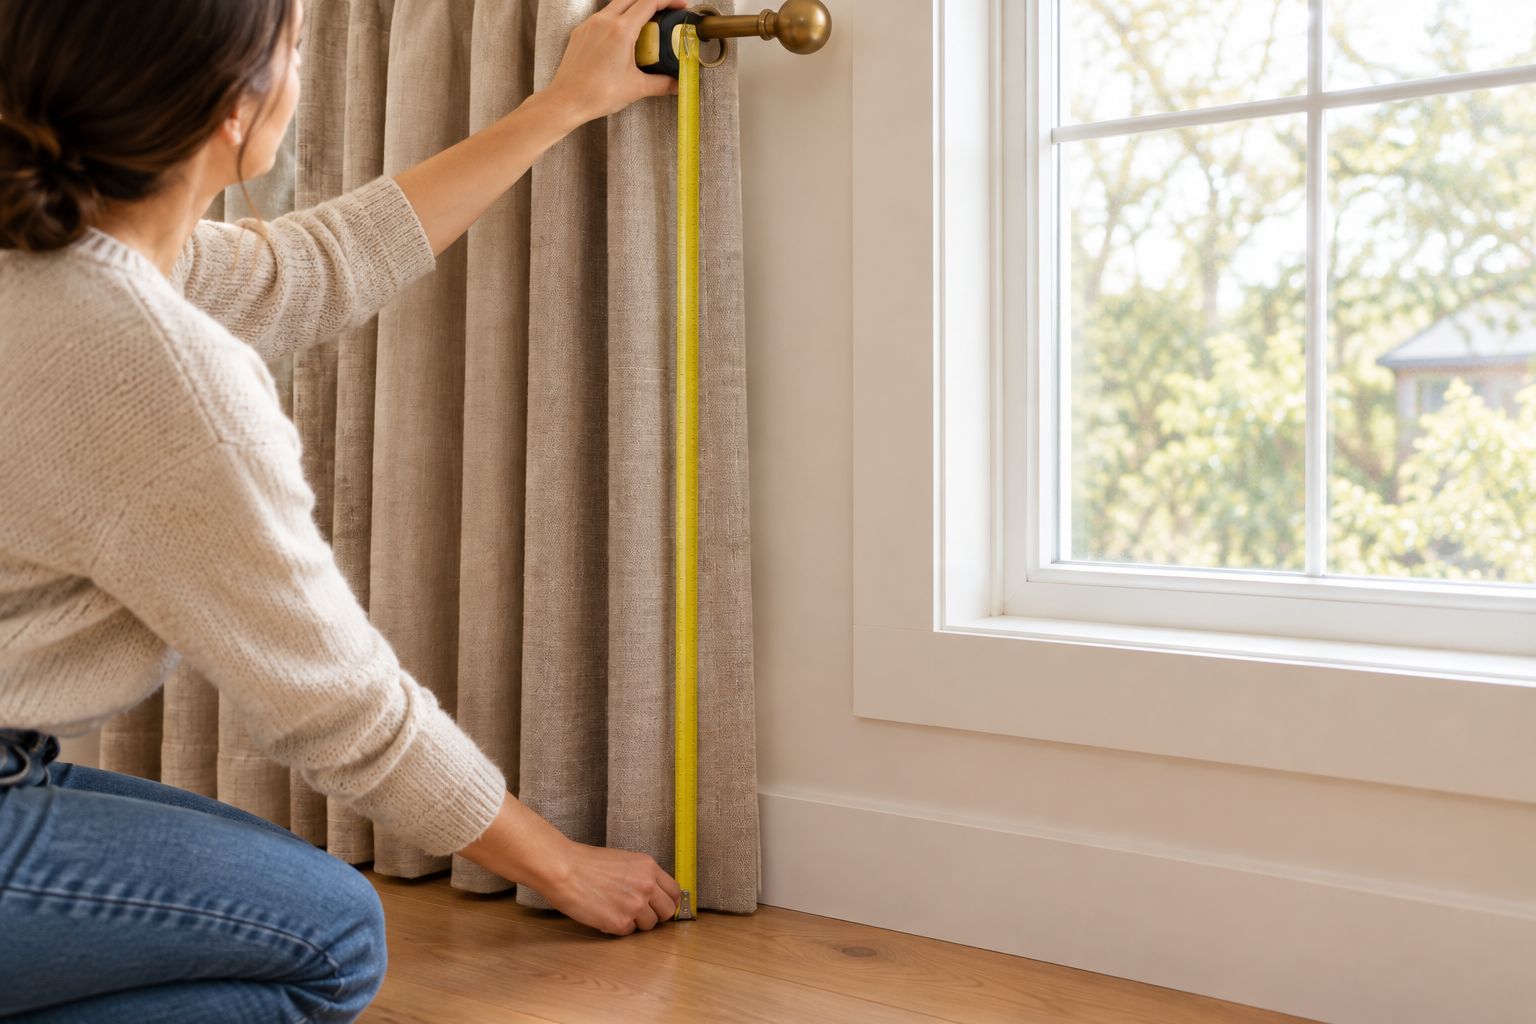
- Confirm Finished Length. Measure from the reference point required for the selected hardware and heading to the intended lower edge. State that reference explicitly. A rod-top measurement is not the same as a ring-eye or carrier-based measurement.
- Check Floor Variation. Read the distance to the floor at the intended left edge, center, and right edge. Decide with the fabricator how to handle an uneven floor, especially when the desired hem sits close to it.
- Specify Fabric and Lining. Record the exact identifiers supplied for the selected materials. Review samples in the room and confirm how lining, pattern direction, seams, and pattern matching affect the intended result.
- Record Panel Arrangement. State the panel quantity, location, draw direction, and whether matching windows should share a visual top or hem line. Keep quantities separate from dimensions.
Expected result: the specification describes the finished treatment, not merely the opening it will cover.
A useful 2026 worksheet keeps these labels together: Window ID, Hardware Reference, Finished Width Definition, Finished Length Reference, Panel Arrangement, Fabric, and Lining. Leave unresolved fields clearly marked; a blank is safer than an assumed answer.
For the hem, describe the intended result in plain language: clear of the floor, touching the floor, or resting on it. Then have the fabricator translate that intention into an agreed dimension. Extra fabric on the floor affects cleaning and movement; a raised hem changes the visual line.
Order review
Approve the specification before release
- Request a Written Summary. Bring together the window record, hardware selection, finished dimensions, fabric identifiers, lining, and panel arrangement. Ask the fabricator to flag anything it has calculated rather than copied.
- Read Every Dimension Back. For each window, say what the number means and where it starts and ends. Check units and distinguish per-panel width from total treatment width.
- Resolve Installation Ownership. Confirm who verifies mounting conditions, who measures for fabrication, and who installs. Ask how a measurement change is handled before authorizing production.
- Approve One Version. Give the approved document a revision identifier and date, such as your final 2026 specification. Mark previous versions as superseded and send the same approved version to everyone responsible.
- Retain the Record. Keep the approval, photographs, material identifiers, and installation notes together. After installation, document any agreed adjustments against that record rather than relying on memory.
Expected result: the order can be traced to a specific, approved set of decisions, with no competing dimensions in email threads or handwritten notes.
Do not release an order with an unresolved measurement definition. Oakloominteriors offers interior design guidance, but the selected fabricator's measuring instructions must govern the fabrication submission.
A second workflow: replacing panels on existing hardware
Keeping an existing rod or track changes the starting point, not the need for verification. Begin with the installed support instead of choosing a new mounting position.
- Inspect the hardware. Identify its type, attachment method, operating condition, and suitability for the proposed fabric. Ask an installer to assess uncertain fixings or components.
- Measure the working span. Separate the usable support length from decorative ends and record where the fabric actually hangs.
- Confirm the attachment. Share close photographs and measurements of rings, hooks, or carriers with the fabricator. Do not assume a new heading fits existing components.
- Check the old panels critically. Use their dimensions as a reference only if their fit is the result you want. Existing drapery can preserve an old measuring mistake.
- Reapprove the finished dimensions. A different heading or fabric changes the specification even when the hardware stays in place.
For a 2026 refresh, retaining hardware is a design decision to verify, not an automatic shortcut. Return to the full workflow if the support, fixing position, or operating style changes.
Troubleshooting
The measurement form asks for width without defining it
Pause the submission and ask for the field's definition in writing. Confirm whether it means opening width, hardware span, finished panel width, or total treatment width before entering a value.
The hem will not sit evenly across the window
Recheck the support's level and the floor readings separately. Ask the fabricator and installer to agree on the hem reference; changing length alone does not correct an uneven mounting position.
Open panels cover more glass than intended
Review the space occupied by the open fabric and the available support beyond the opening. Ask whether a revised mounting span or panel construction addresses the problem before changing the order.
The chosen fabric conflicts with a handle or heater
Recheck projection and the relevant clearance instructions. Discuss a different mounting position or treatment with the installer; do not solve a safety conflict by tying fabric out of the way.
Two versions of the measurements are circulating
Stop approval until the responsible parties reconcile the differences. Issue one replacement specification with a clear revision identifier, then obtain confirmation that earlier versions will not be used.
Customize your workflow
For several rooms, keep one worksheet per opening and a separate room summary. Share design choices across rooms only after checking the physical conditions at each window.
Ask Oakloominteriors about interior design support if the drapery decision also affects furniture, lighting, or wallpaper. The benefit is a coordinated room plan; the boundary is that design guidance does not replace a fabricator's technical approval or an installer's assessment of the mounting surface.
Before approving your 2026 order, review the fabric in its intended room alongside the other finishes. One thoughtful decision at a time is useful here: settle function, then construction, then the details that make the treatment feel at home.
FAQ
What measurements do I need to order custom drapery?
You need the opening dimensions, surrounding wall space, proposed hardware position, and the finished dimensions required by your fabricator. Also document obstructions, floor variation, heading, panel arrangement, and the reference point used for length.
Should I measure the window or the curtain rod?
Record both, but keep them separate. The window describes the opening, while the working rod or track span helps define the treatment; the fabricator's form determines which measurement belongs in each field.
How much wider than the window should custom drapery be?
There is no single width allowance that fits every custom drapery order. Confirm the mounting span, coverage, fullness, heading, and space needed for open panels with the fabricator before approving finished width.
Where do I start measuring custom drapery length?
Start at the reference point specified for your selected hardware and heading. Confirm whether the fabricator expects a measurement from the rod, ring attachment, carrier, or another defined point.
Can I use my old curtains to measure for new ones?
Use old curtains as a reference, not as the sole measurement record. Recheck the installed hardware and floor, and confirm that the old length and coverage are actually what you want to reproduce.
Should custom drapery touch the floor?
Choose the hem position according to the look, cleaning needs, and movement required in the room. Tell the fabricator whether you want clearance, contact, or fabric resting on the floor, then approve the corresponding finished length.
Can Oakloominteriors help with the room around my drapery?
Oakloominteriors offers full-service and à la carte interior design for homeowners furnishing or renovating their spaces. Ask about the scope of support for your window-treatment project and confirm separately who handles technical measurement, fabrication, and installation.
One last thing
An exact number can still be the wrong measurement. Before signing, point to the beginning and end of every dimension on the sketch. If everyone cannot identify the same endpoints, the order is not ready—even when the arithmetic is correct.